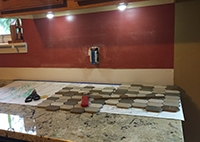
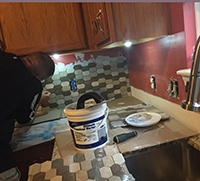
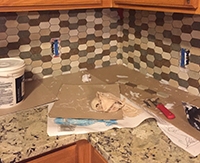
Installing a Tile Backsplash!

When looking to upgrade or just freshen up your home there are two sure-fire ways to get that quick punch of color: paint and tile.
More than likely, the most time consuming part of this project is simply in the tile selection process.
The selection of tile had gone through a major boom in recent years. Both the material and styling as changed dramatically, and it has also made it easier for the DIY homeowner to tackle on a weekend. There are even groutless tiles now that will let you skip that step completely.
Glass. Porcelain. Ceramic. Stone. Stainless Steel. Mosaic. Subway. Diamond.
You can find a small sampling of fantastic backsplash designs here.
Once, you’ve selected your tile then it’s time to dig in and bring your plan to reality. You can get all the supplies you need from your favorite hardware store.
The basic list should include:
| Tools | Materials |
|---|---|
(Optional items based on your tile selection and/or budget) |
|
5 simple steps

1.) Have a plan
Before you lay or cut anything be sure you have measured once – and then measure again. Whether you plan to lay your tiles in an even grid or add special elements you need to create a template. Without this step you could be caught short on supplies or worse, with a kitchen backsplash that looks great if you turn your head 5 degrees to the left.
2.) Do your tiles make the cut
It’s best if you start with the bottom row and edges, make those cuts first to ensure that your layout is level before you place any tiles in the mastic. The top row, usually ending at your cabinets, as well as electrical cutouts can be done as you move down the wall adhering tiles. By waiting, you give yourself a bit of leeway in case your tiles don’t layout exactly as planned.

3.) Making the plan stick
Before you lay or cut anything be sure you have measured once – and then measure again. Whether you plan to lay your tiles in an even grid or add special elements you need to create a template. Without this step you could be caught short on supplies or worse, with a kitchen backsplash that looks great if you turn your head 5 degrees to the left.

4.) Tile Installation
Once you have a few square feet of wall prepped, press your first tiles into the mastic. Be careful not to let the mastic ooze between the tiles too much. Keep your spacers between the tiles to avoid sliding and ensuring the right spacing for grout later.
Continue alternating between applying mastic to the wall and pressing in the tiles. You can save the tricky tiles that need to be trimmed around electrical outlets or your edges until the end. Rather than apply mastic to the wall, you can apply it directly to the back of the tile and set in place.

5.) Get in the groove
Once completed laying tiles you get to rest at least 24 hours while your tiles set and the mastic dries. The final step is to fill the spaces between your tiles with grout. Again you can choose to buy pre-mixed or powder forms.
The grout float will easily spread the grout over the tiles and into the open spaces. Like the mastic, you will still want to work in small areas and alternate applying and using a sponge to wipe off and remove the excess grout from the tiles.
Use a line of caulk to the top and bottom edge of your tiled area. This is recommended since grout is solid, caulk will give your backsplash some flexibility against any settling or shifting over time without cracking. Now is also when you can reset your electrical outlets and re-plate. If you need any assistance with the electrical work, Mister Quik is always available to help.
Once complete, you can sit back and relax or start planning your next dinner party to show off your handiwork to friends.
For more home improvement ideas, be sure to visit the rest of Mister Quik for heating, cooling, plumbing, and electrical services!


